Destructive Testing
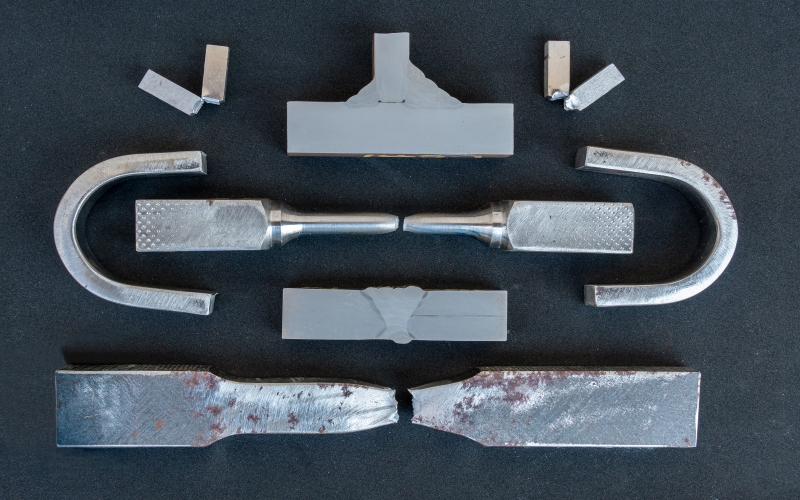
Destructive testing (DT) is a type of testing that involves the intentional destruction of a material, component or assembly to evaluate its mechanical, physical or chemical properties. DT is typically used to determine the strength, ductility, toughness and other properties of a material or component, and it may involve breaking, cutting, bending, or crushing the sample to obtain test data.
Some common types of destructive testing include:
- Tensile Testing: This method involves applying a controlled load to a material sample to measure its strength, ductility, and other mechanical properties. The sample is typically pulled in tension until it breaks, and the load and deformation are recorded.
- Hardness Testing: This method measures the resistance of a material to penetration or indentation. The hardness value is typically related to the strength and toughness of the material.
- Impact Testing: This method involves striking a material sample with a controlled force to measure its toughness or resistance to fracture. The sample may be subjected to a Charpy or Izod test, which involves striking the sample with a pendulum or hammer and measuring the energy required to fracture the sample.
- Fatigue Testing: This method involves subjecting a material sample to repeated cycles of loading and unloading to measure its resistance to fatigue failure.
- Fracture Testing: This method involves examining a material sample after it has been fractured to determine the cause and mode of failure.
Destructive testing is generally more expensive and time-consuming than non-destructive testing, and it requires the preparation and testing of a sample, which may not be representative of the entire component or structure. However, DT can provide more accurate and detailed data on a material’s properties, which can be used to improve the design and performance of materials and components.
Non-Destructive Testing
Non-destructive testing (NDT) is a group of methods used to inspect, test, or evaluate materials, components, or assemblies without damaging or altering them in any way. NDT is used to detect surface and subsurface defects, cracks, discontinuities, and other imperfections that may affect the performance or integrity of a material or structure.
NDT methods can be divided into several categories, including:
- Visual Inspection (VI): This is the simplest and most common NDT method, which involves the use of the naked eye or a magnifying glass to examine the surface of the material or component for any visible defects or irregularities.
- Radiographic Testing (RT): This method uses X-rays or gamma rays to produce an image of the internal structure of a material or component. It is used to detect flaws that are not visible to the naked eye, such as cracks, porosity, or voids.
- Ultrasonic Testing (UT): This method uses high-frequency sound waves to detect internal flaws or defects in a material or component. UT can detect cracks, voids, inclusions, and other defects that are not visible to the naked eye.
- Magnetic Particle Testing (MPT): This method uses magnetic fields and iron particles to detect surface or subsurface defects in ferromagnetic materials. MPT is used to detect cracks, laps, seams, and other surface irregularities.
- Liquid Penetrant Testing (LPT): This method uses a liquid dye or fluorescent penetrant to detect surface defects or cracks in non-porous materials. LPT is commonly used in aerospace and automotive industries.
- Eddy Current Testing (ECT): This method uses electromagnetic induction to detect surface or subsurface defects in conductive materials. ECT is commonly used to detect cracks, corrosion, or erosion in tubes, wires, or other conductive materials.
NDT is an essential part of quality control and assurance in many industries, including aerospace, automotive, manufacturing, construction, and engineering. It ensures that materials and components are free from defects and meet the required standards and specifications.
Author: James Murphy, Operations Manger of IPEC Inspection Ltd.
